
 I've been keeping busy designing and building... but no worries, because a Special Edition of Bullet Sunday starts now...
• Cat Feeding Station! When it came time to decide where I wanted my "designated cat areas to be," everything came together fairly easily. Their food would be in a corner of the dining room next to the kitchen... the litter box goes next to the cat tree... and so on. The problem is that I'm not happy with how things work. The litter box really needs to be moved to the garage, but I'd have to build a pass-through and a containment cage. That's a big project. A smaller project? Building a feeding station...
And so? This weekend was the weekend to build that feeding station!
• Planning! I always start with a sketch like this...
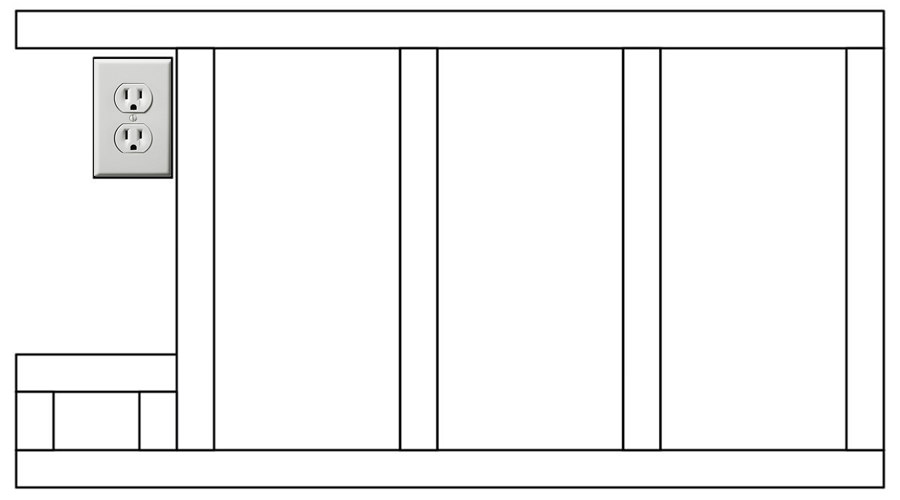
On the left there is the power outlet and an open space large enough to hold the power strip and all the cords for the water fountain and auto-feeders. All the posts in the framing seem like overkill, but since I'll be leaning on it I wanted it to be sturdy.
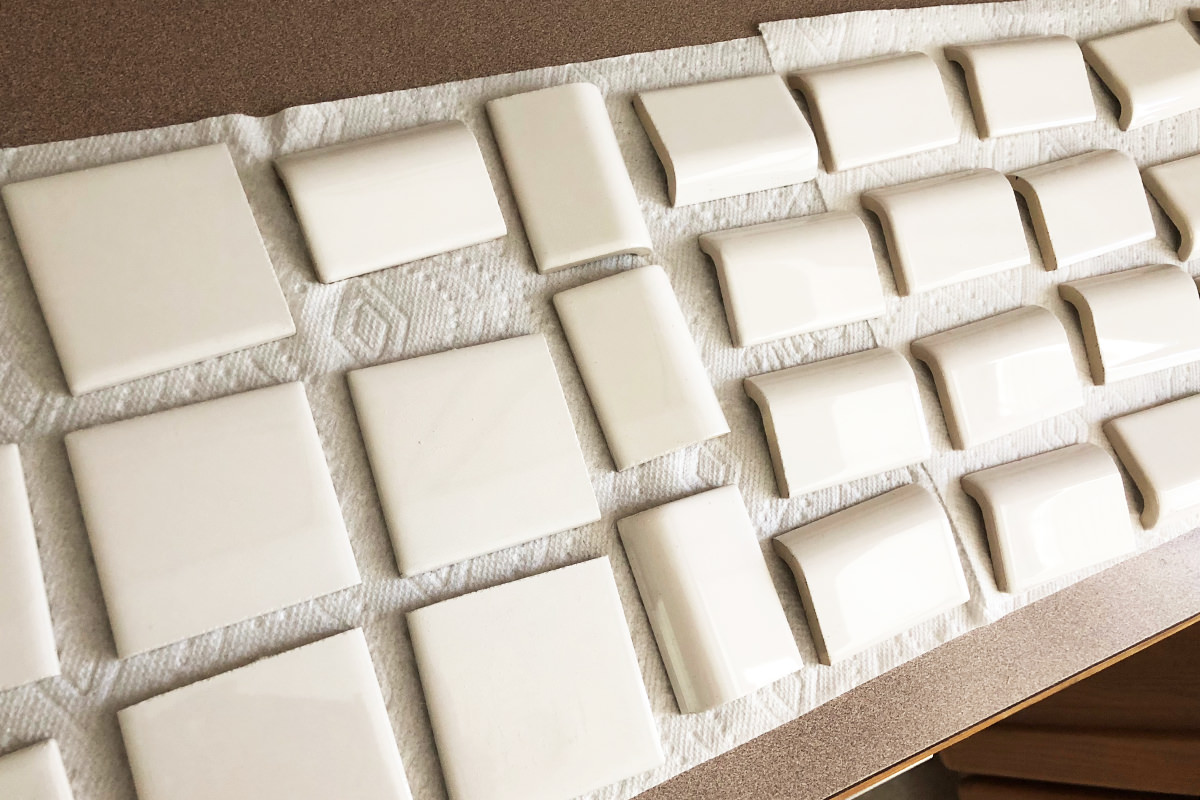
• More Planning I had a hundred bucks worth of subway tile in my garage that I bought to put a partial backsplash in my kitchen. I decided I wanted a full backsplash, so it's all been collecting dust. I decided to use it for the feeding station, but had to make sure I had enough of the stuff, so I laid it all out...
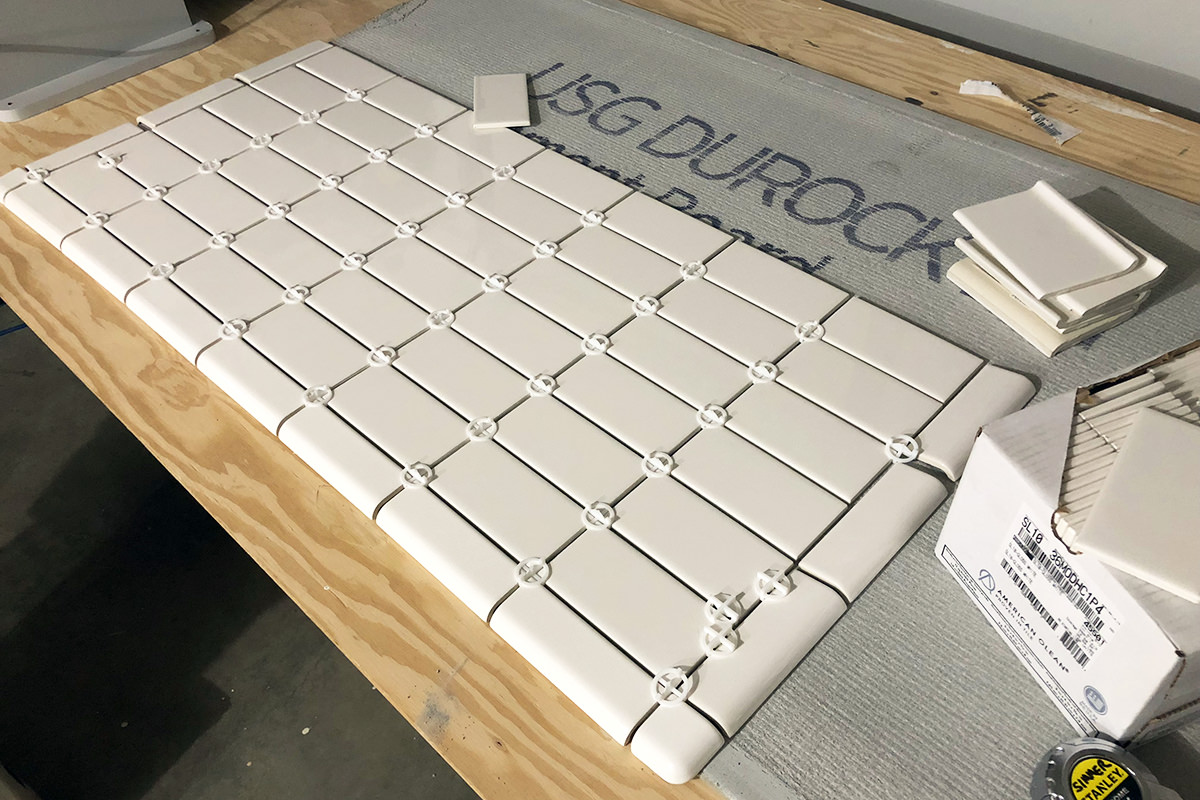
I also wanted to make sure that I had enough rows so a "bricklayer" pattern would alternate nicely between the edging.
• Even more planning! I am horrified at the thought of wasting material or having a project turn out wrong, so I am very careful when planning things out. It's not enough to calculate the dimensions... I also have to stack up the materials to verify the calculation... then I have to actually model things out to make sure that I am accommodating things like baseboards, plywood underlay, cement board, thinset thickness, tile spacing, and so on...
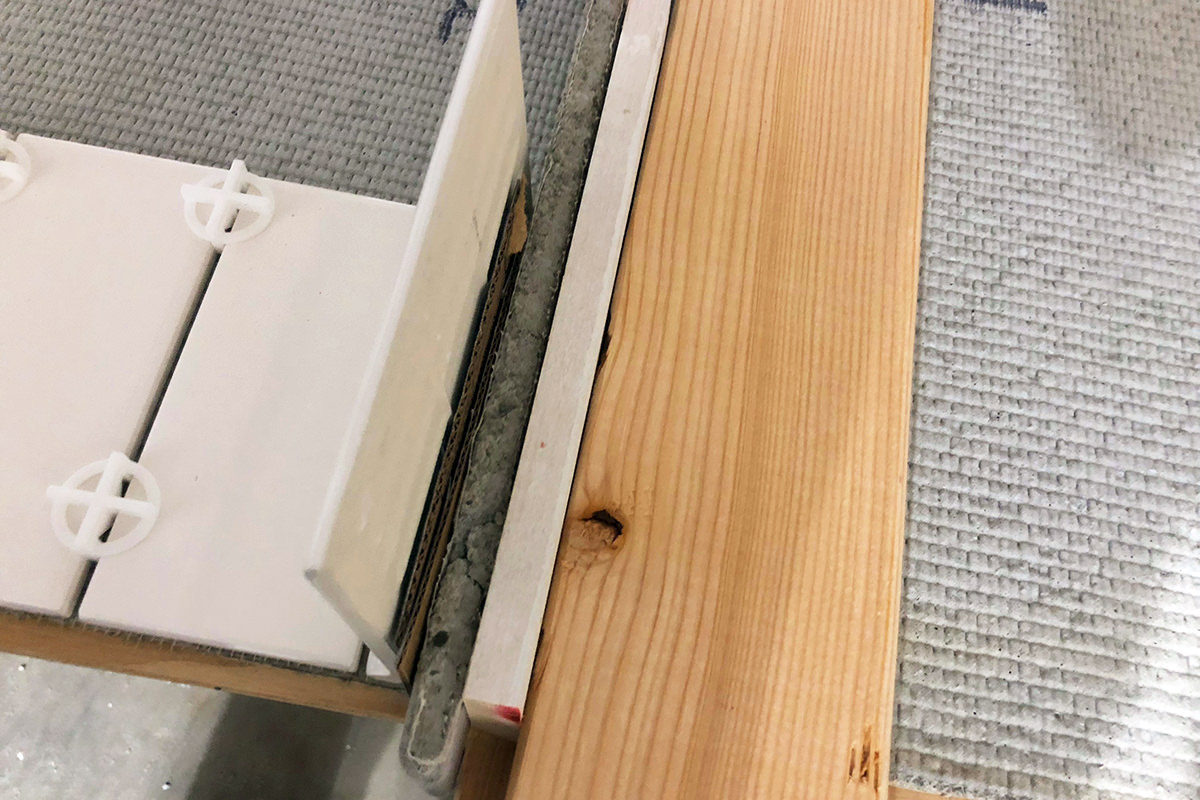
Sure it's a big time-waster, but at least I know that everything will turn out perfectly.
• Framing! Once I've figured out how big everything has to be, I cut some cement board for the floor and frame everything out...
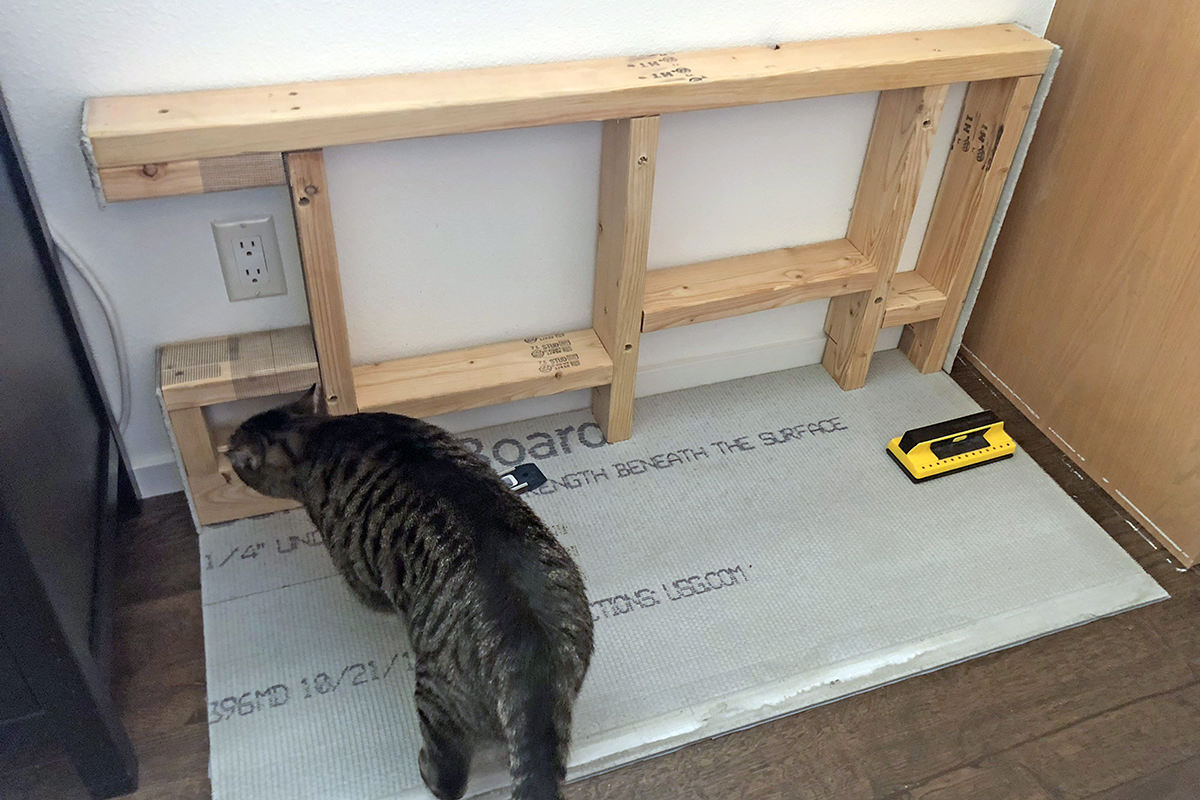
Because I'm leaning on this, I have to be sure I'm bolting it to the studs in the wall, hence the frame has to match them.
• Corded! I mocked up the space I would need for the power cords and such so I could make sure everything fit easily. Thanks to this advance planning, it did, even if the wall bolts had to be off-center a bit on that last stud...
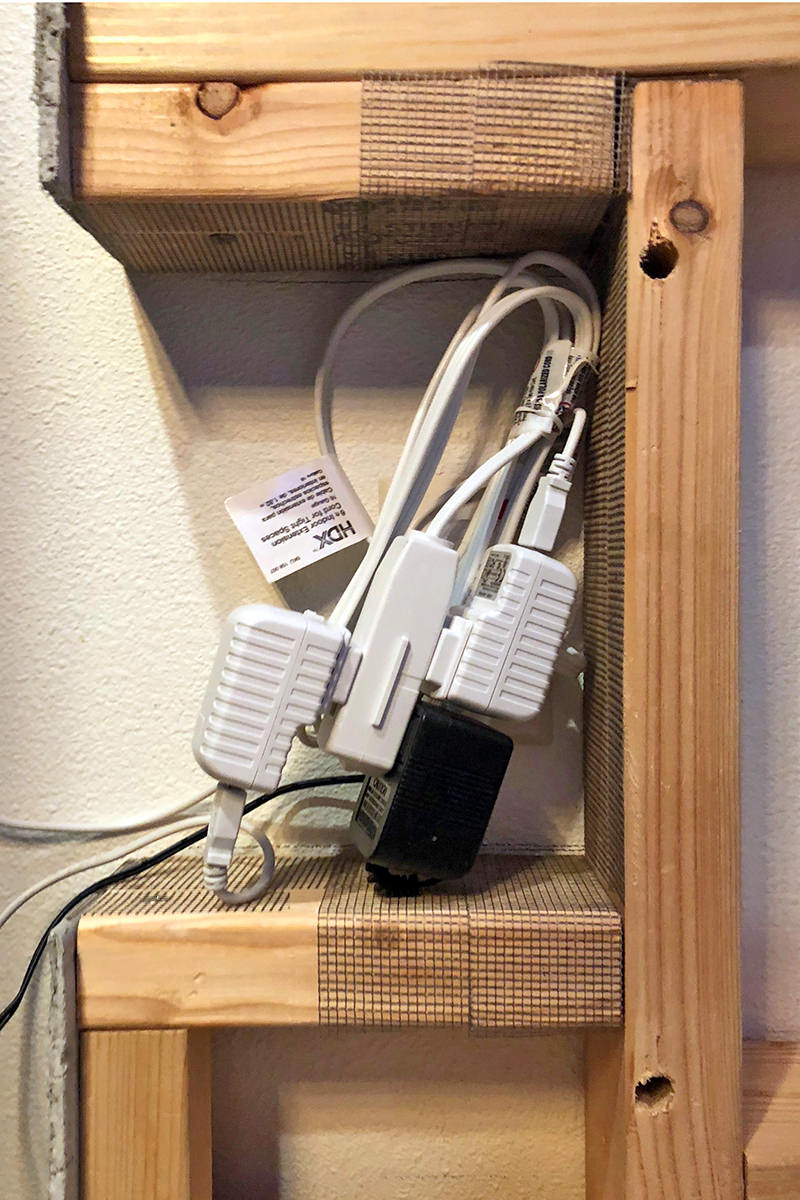
That's cords for two auto-feeders and a water fountain power adapter.
• Power Supplies! At the last minute I decided to add a conduit pass-through for power cords...
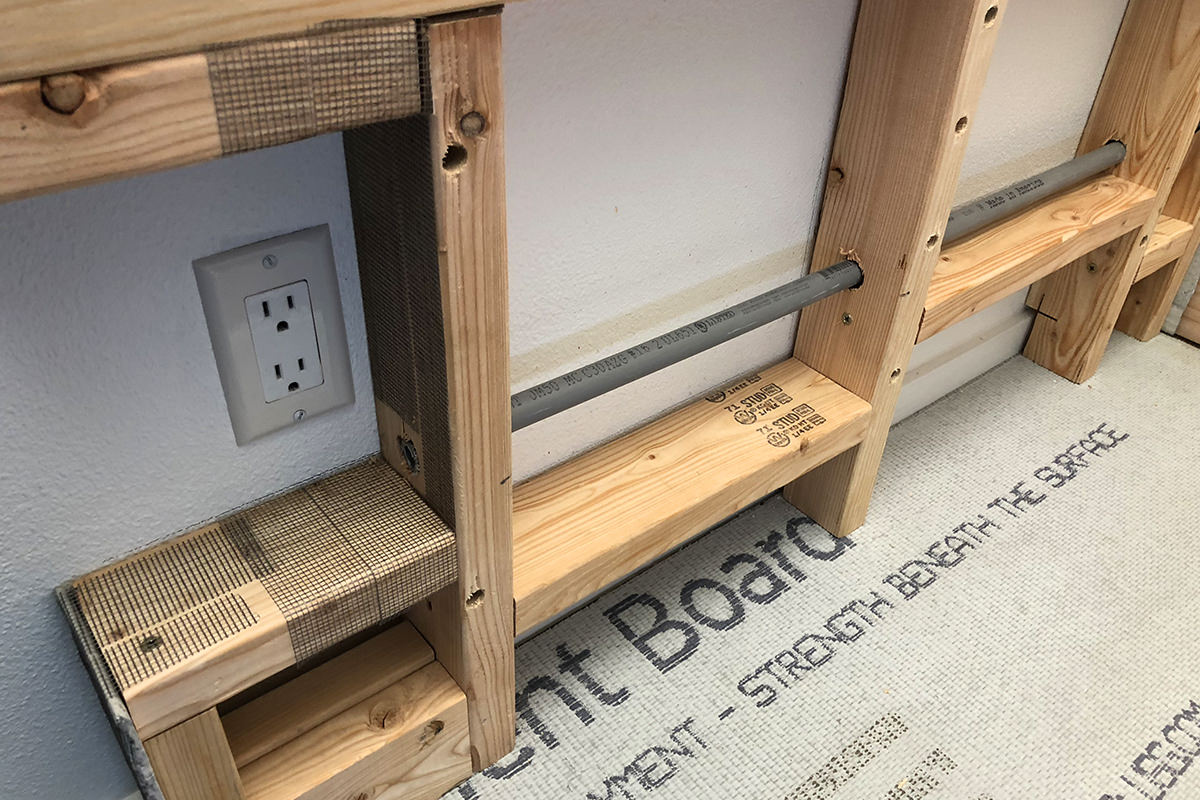
This way I can minimize the amount of cords hanging out everywhere.
• Underlay! And here's where everything gets covered up with plywood...
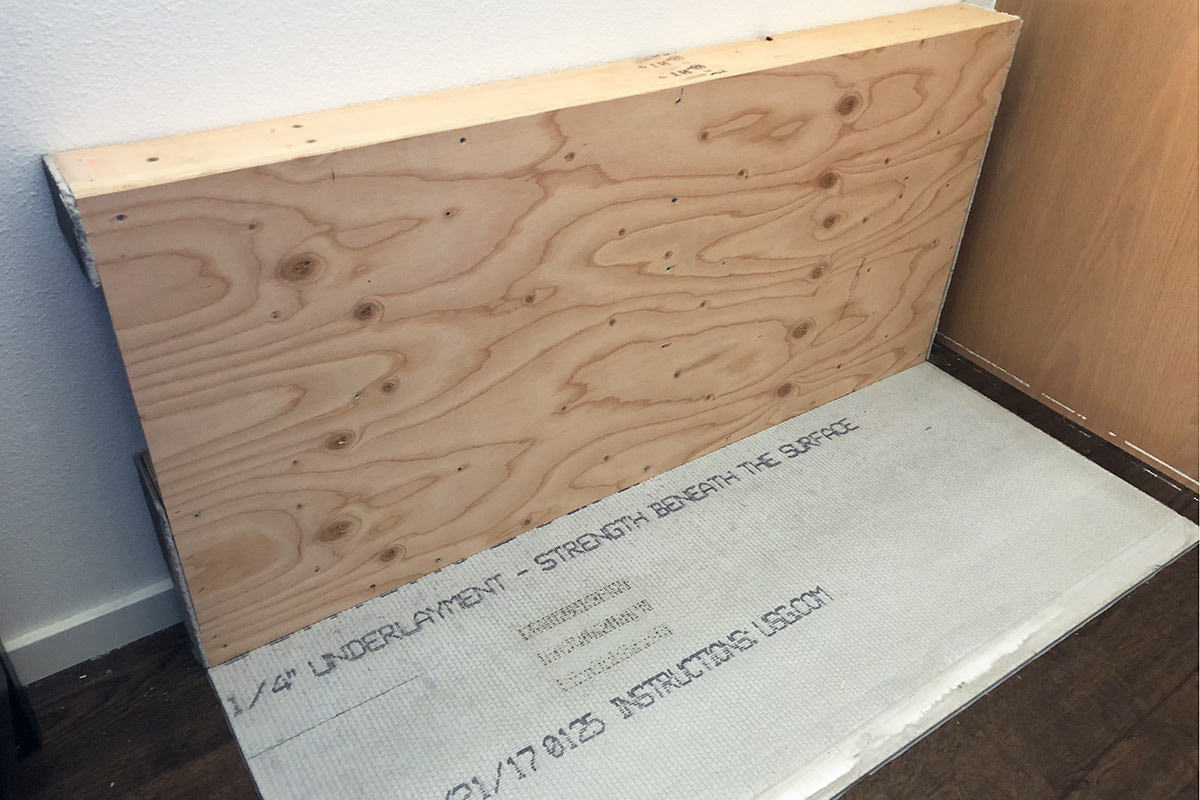
I went pretty thick for stability... I don't want the tiles popping off when I lean on it.
• Underlay Part Two! I don't like working with cement board at all, but it's a necessary precaution when you are working with a tiled surface that's going to get wet. That way if you do end up with a leak, everything won't swell and flex...
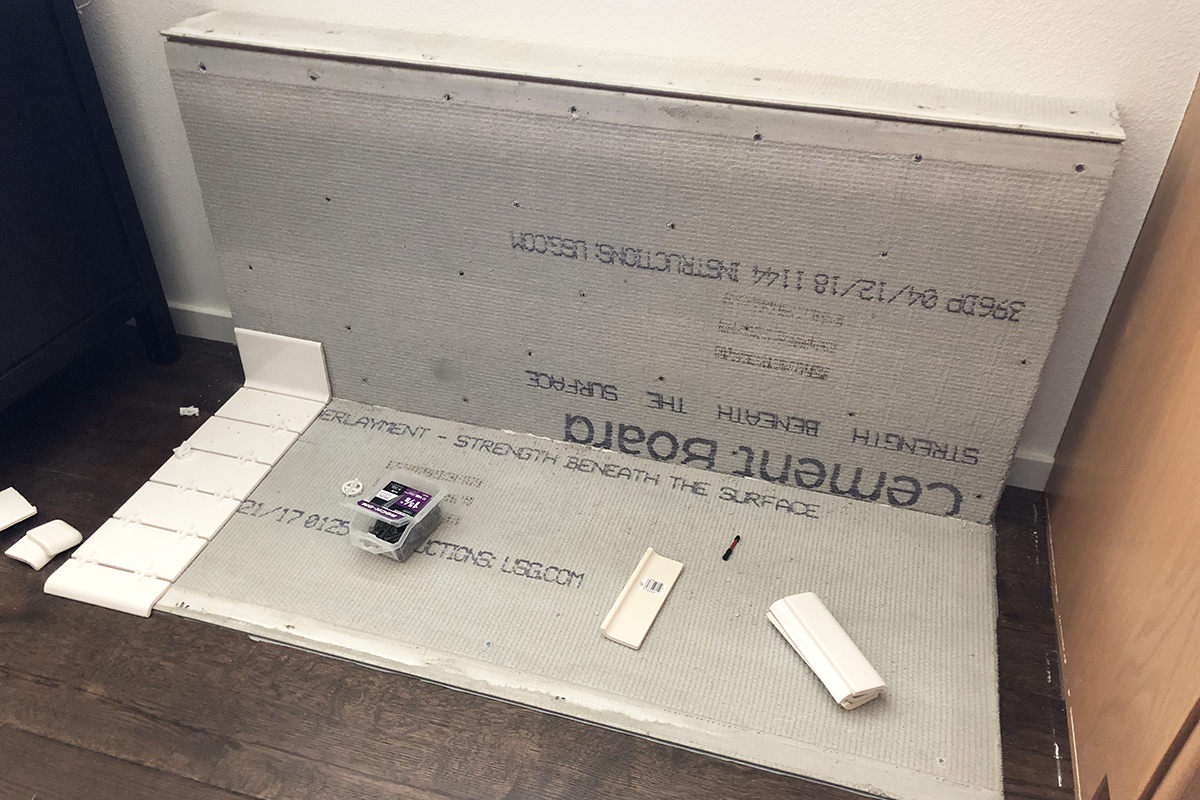
Note that careful advance planning resulted in a perfect fit for my tiles.
• Wet Cutting! I bought a "wet cutter" for chopping up tile, but had only used it once before on flat tile. I had no idea if curved (mud-cap) tile would be a problem. Thankfully, it wasn't...
If you are doing a tile project I highly, highly recommend buying (or borrowing or renting) a wet cutter. I bought a cheap one for $80 that spits water everywhere and makes a heck of a mess... but it gets the job done (I just cut a piece of plastic to make a full bib when I use it!). I've tried the tile-score units, but they never do as nice a job and can result in busted, chipped tiles.
• Tile Up! This is my second tile project. If you look real close, you'll see that I'm not very good at it yet. But so long as you use a grout color that's not high contrast (like black for white tile) it will look just fine. How I learned this was watching Flip or Flop on HGTV. The one thing that Tarek seems to be capable of is laying tile. I figured if he could do it, I could certainly do it... because any time there is a close-up of his work, it looks pretty bad. Furthermore, any time I've hired a professional, it never looks perfectly set either, so I figured "what the heck" and dove in. Thanks to YouTube videos, you can learn how to do anything...
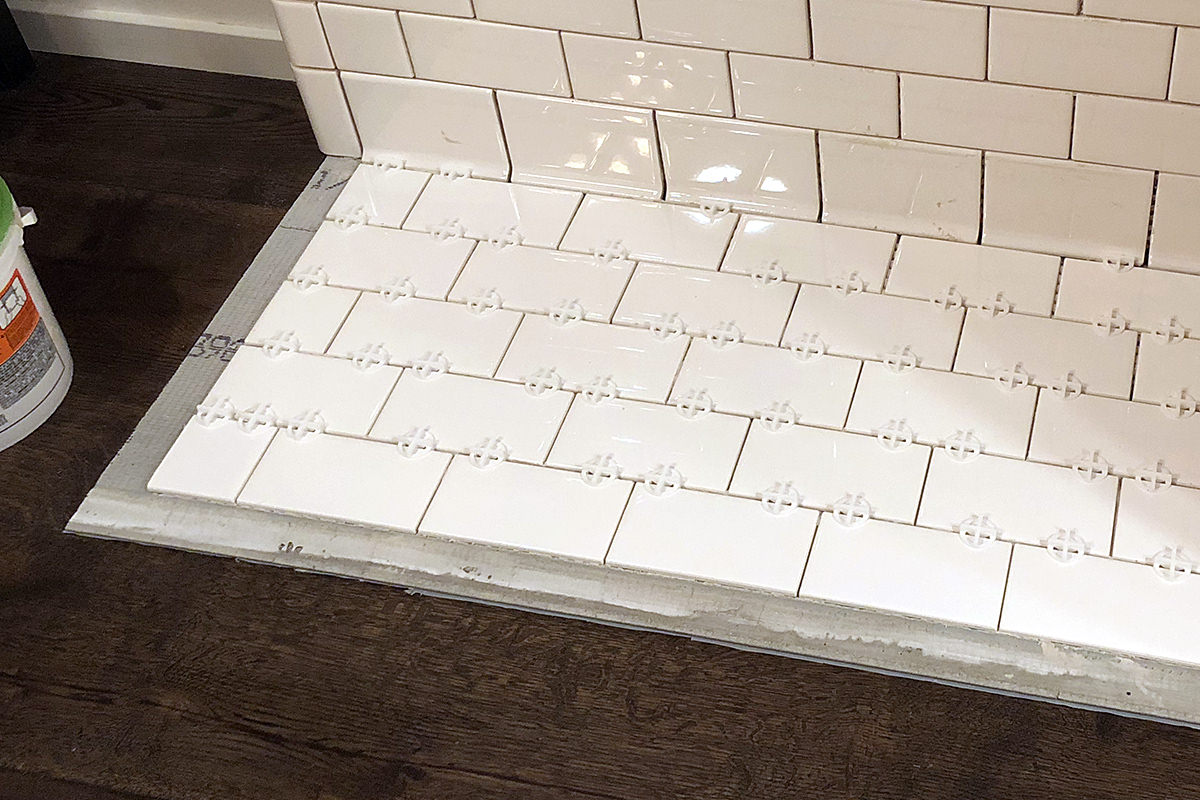
Note that on the floor I didn't set the edge tiles at the same time as the rest. The reason for this is that I am trying not to damage the flooring as much as possible. This means not getting thinset mortar on the hardwood. Instead I put a bead of clear silicone on the edge that touches the floor, then "butter" the backs of each piece so I can carefully drop it into position. Sure it's a lot of extra work, but ultimately worth it. Under the cement board is plastic sheeting to protect the floor even more. About the only damage I did was three screws to secure the board in place (and there was probably a little leakage on thinset that would have to be chiseled off). So now if I ever change my mind on the feeding station, I can tear it out with minimal restoration needed to the original structure.
• Busted! I use a Dremel tool with a ceramic cutting attachment to roughen the edges of the cove base tile (getting rid of the glaze so the grout will stick better). I figured if I was going to damage a tile, that would be the time. Fortunately, that wasn't the case. Unfortunately I ended up with a damaged tile anyway. One of the mud-cap pieces was cracked when I pulled it out of the box...
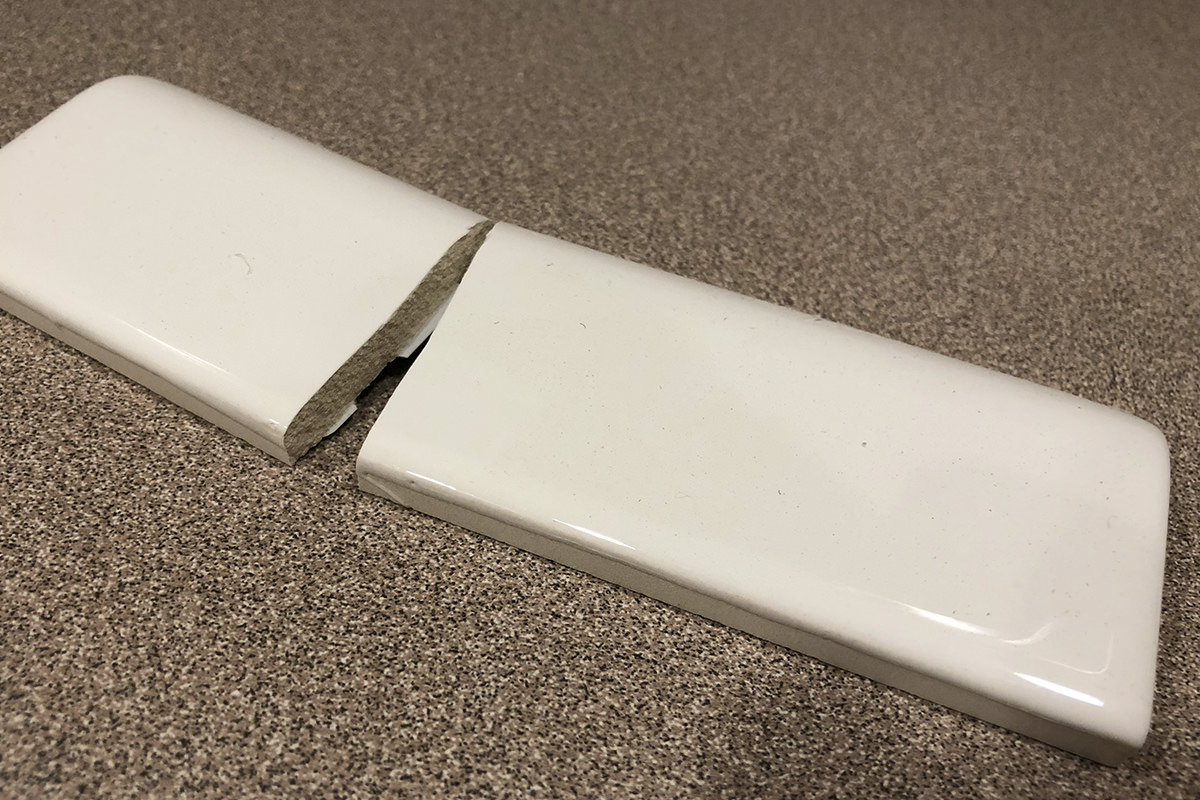
Since I had exactly the number of pieces I needed, I was in a panic. I bought the tile from Lowes at least a year ago... would a replacement tile match? Fortunately, the answer was yes.
• Finale! Tiling done! Now I just have to wait for the thinset to dry so I can grout it up!
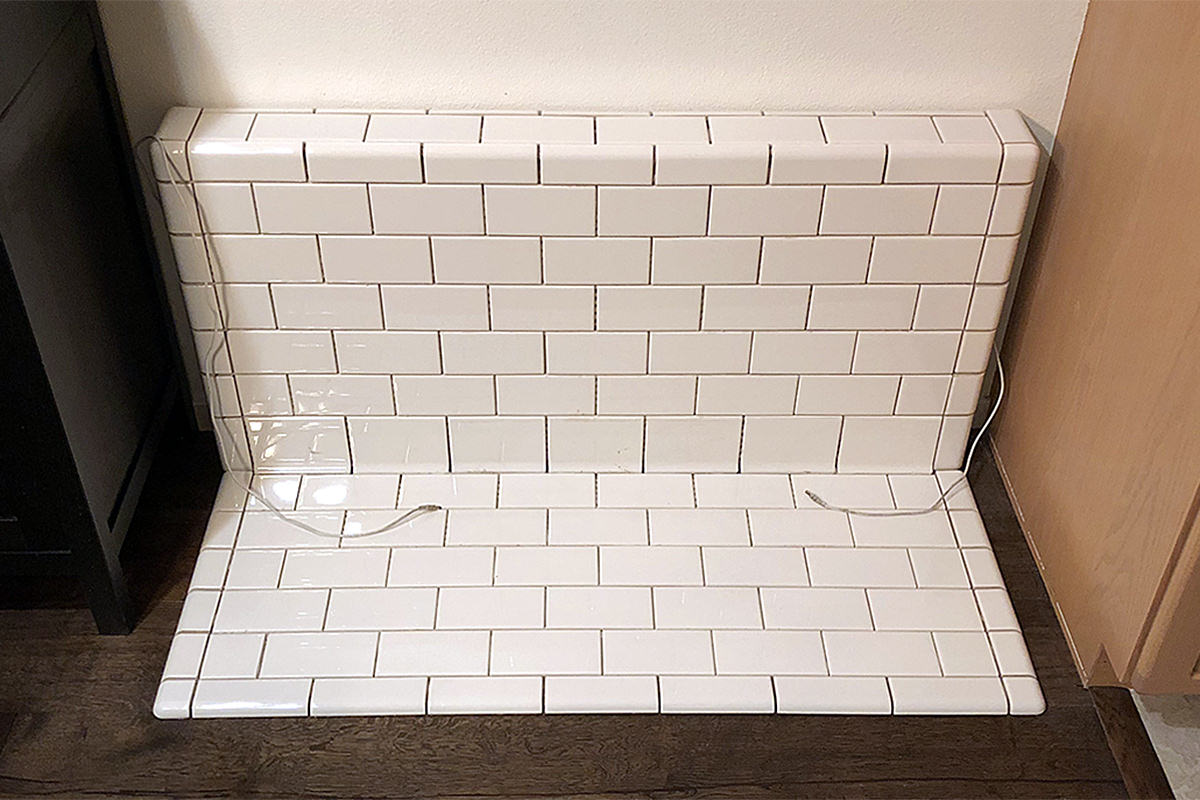
Note that I am so concerned about having the tile pattern be balanced and equal that I even put a thin line of pencil tile in the back so it begins and ends on a row of full tiles (I also made sure that the alternating pattern was maintained around the corners!).
And so... almost complete. Overall I'm quite happy with how it turned out. Jenny's messes can be cleaned up easily. The power strip and wad of cables is concealed. The power cords can be hidden when I'm not using the auto-feeders. And I have a really good support to lean against when setting down or picking up food bowls when my back is out! On top of that, it will match what I'm planning to do in my kitchen/laundry room remodel (and matches the square tile used in my bathrooms).
The nice thing about it being tile is that I can hang stuff on it with suction cups! I can label their bowls and even decorate for the holidays... assuming my cats would leave it all alone!
• Inside! Given how much I love to design and build things, I will probably be the one who ends up tearing this out to make something different. But, in case I'm not, I left a note for future owners if they decide they don't want a pet feeding station...
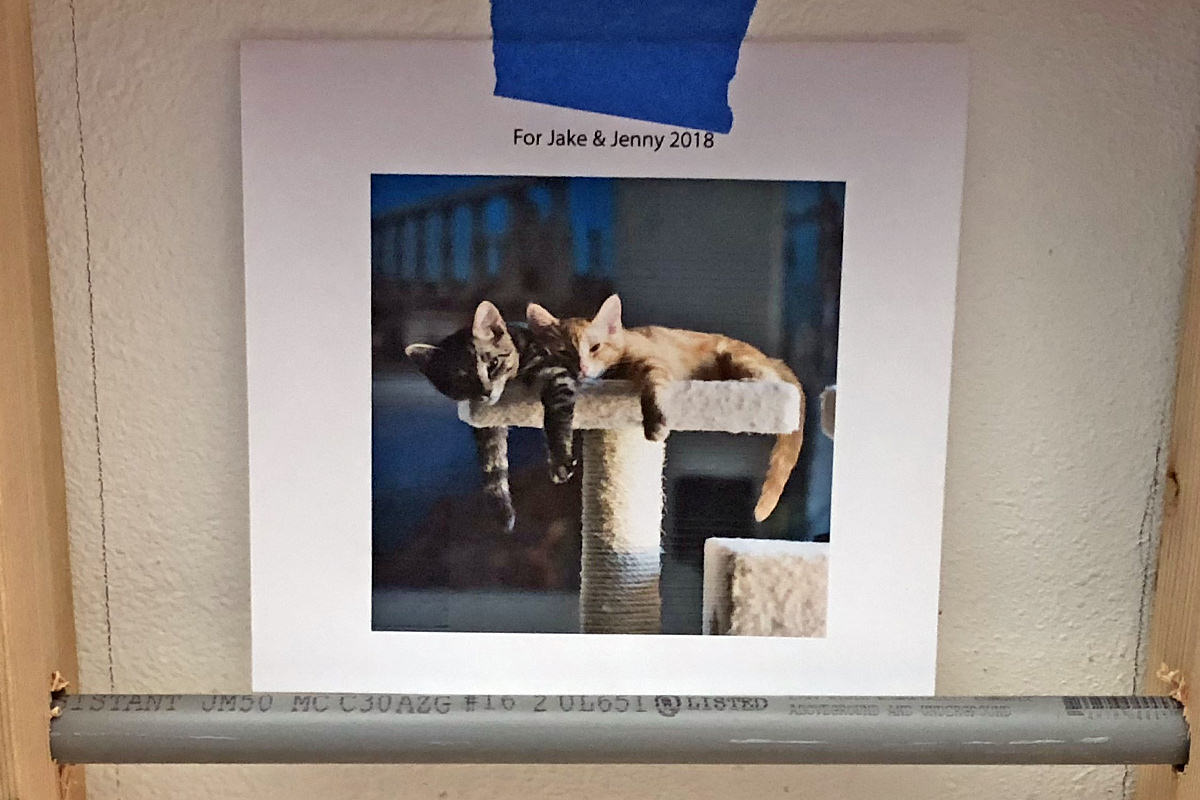
Now they know who to blame that there's this ceramic tile construct in their dining room!
And that's all she wrote... FOR TOMORROW WE GROUT!

I love comments! However, all comments are moderated, and won't appear until approved. Are you an abusive troll with nothing to contribute? Don't bother. Selling something? Don't bother. Spam linking? Don't bother.
PLEASE NOTE: My comment-spam protection requires JavaScript... if you have it turned off or are using a mobile device without JavaScript, commenting won't work. Sorry.

I’m in awe. Seriously impressed. And a wee bit scared.